Saturday, January 19, 2013

Giveaway for Students!!

Moving can be great. Moving means new adventures, new people, new environment, new routine, but most of all getting rid of the old. If you have moved before, you know that there comes a time when packing where some that stuff just doesn't make the cut. You know what I am talking about. That XXL t-shirt you won at a college basketball game, the desk chair that is on it's last leg (literally), or all those old college textbooks you kept because you couldn't resell them or thought you might use them later (and never did).

Source
When we moved, I probably threw away enough textbooks to outfit an MBA student for an entire semester. Do you know how expensive that is?! I cringe just thinking about it!

If you are a college/grad school student or the parent to a college/grad school student, you know the inevitable frustration involved with buying text books. For me it was 1) they were way to expensive, and 2) after the semester was over I could only sell them for a fraction of the price! Don't they know college students are poor?

Finally it seems as if someone understands that frustration! RentBack is a online bookstore where you can actually rent your text books to other students around the country. Just think about it. Instead of selling your books for a one time, insultingly low price, you can rent your text books out to other students, like you, over and over again. Every time your book gets rented, you get money! You could make 2 to 4 times more money off of that one textbook than if you were to sell it back.

Are you just about to start college or grad school and have no textbooks to rent out? Perfect! You can rent your textbooks through Campus Book Rentals, which is the rental arm of RentBack. By renting your textbooks, you can save 40% to 60% off of retail prices! Plus, you get free shipping on all books, you can highlight in them if you want, and your renting period is totally flexible! Plus, Campus Book Rentals will donate to Operation Smile with each book rented.

Does it get any better?

Seriously, where was this when I was in school. Actually, they were probably around when I was in grad school, but I just didn't know about it! If only I could have rented those text books and made some money off of them!!

For more information on how it works, see the video below.

Now, for the best part...Campus Book Rentals is offering a $50 coupon for one of my readers which can be used at their online textbook store. If you are in college, you know that every dollar helps! Plus, at CBR, $50 will go a lot further than at your school's bookstore!


a Rafflecopter giveaway


**This post was sponsored by Campus Book Rentals and Rent Back, but all opinions are entirely my own.


Thursday, January 17, 2013

It's OK Thursday

It's only Thursday? This week has felt so long. Maybe because I am getting used to my new routine...which is not a routine at all. Oh well, tomorrow is Friday. And maybe by then we will have all of our boxes unpacked.

Yeah...it's probably not going to happen.

Today, I feel like accepting all the crazy and disorganized mess in my life.
It's okay....

...that I still step over boxes to get my breakfast in the morning.

...that none of our old furniture really works in this apartment.

...to not drive into the office today because it's supposed to snow this afternoon.

...that I find the office more depressing because I miss my Dallas coworkers.

...that I feel like I'm dating again because B and I are trying to make some friends, which means setting up "friend dates".

...that I feel like B and I are probably the poorest people in our apartment complex.

...to tell anyone who will listen that Claire Danes and Damien Lewis stay in this building when they are filming Homeland (right now that is an unsubstantiated rumor).

...that I really just want to bake something, but have no one and nothing to bake for!

...that we can't find our can opener, so we have had to resort to some uncivilized means to get a can open.

...to really not know where a lot of our kitchen utensils ended up.

...that I have referred to B multiple times as "my husband" this week.

...to not really miss Dallas. But I do miss the people!


Wednesday, January 16, 2013

Guest Post: Chocolate Guinness Cupcakes

Its been a week since B and I set out on our moving adventure. Granted we were delayed a day due to weather. But I feel like stuff is finally coming together!

Today I have asked Jess from Blonde Meets World to guest post! Jess' blog was one of the first that I started to follow, and I have loved getting to know all about her through her super fun blog! She is sharing an awesome recipe with us today. I mean, how can you not like beer and cupcakes?

I'll let her take it away...

Hi, I'm Jess!
I'm little, loud, and love having a good time!  Boston born & raised yet I don't have a Boston accent (I can't stand the way they sound).  The only thing about my speech that would give away my roots is my overuse of the word "wicked".  I blog over at my little space called Blonde Meets World.  A huge thank you to Lindsey for asking me to guest post & good luck with your move!


It took me awhile to decide what to write about.  I don't typically post recipes to my blog, though I'm not sure why because I love to bake.  I might not be the greatest at it, but I certainly give myself an A for effort.  Since Lindsey shares a decent amount of recipes I decided this would be the perfect time to share one of my favorites (given to me from a dear friend), Chocolate Guinness Cupcakes.

I am a beer girl through and through.  I'm also a cupcake fiend.  So why not combine the two?  And yes, I promise you they are as delicious as they sound!  These are definitely in my top 5 out of all the desserts I've managed to whip up.  I certainly suggest trying them yourself (but don't blame me if ya hate 'em!) since they are super easy.

(cupcake) INGREDIENTS:
  • can of Guinness stout
  • whole milk (1/2 cup)
  • vegetable oil (1/2 cup)
  • vanilla extract (tablespoon)
  • 3 large eggs
  • fine salt (1/2 teaspoon)
  • baking soda (1 1/2 teaspoons)
  • natural unsweetened cocoa powder (3/4 cup)
  • granulated sugar (2 cups)
  • flour (2 1/2 cups)
  • sour cream (3/4 cup)


(frosting) INGREDIENTS:
  • natural unsweetened cocoa powder
  • powdered sugar (1 pound)
  • heavy cream (1/3 cup)
  • fine salt (just a tiny bit, a pinch)
  • room temp cream cheese (8 ounce package)


(cupcake) DIRECTIONS:
1. Preheat your oven to 350 degrees
2. Line your cupcake pan with liners (duh! Do I even need to include that?)
3. Whisk together the Guinness, vegetable oil, milk, and vanilla in a large bowl.  
4. Once that is all combined, whisk in the eggs one at a time.  
5. After the eggs are combined completely, whisk in the sour cream.
6. In a second bowl whisk the baking soda, sugar, salt, and cocoa powder.
7. Gradually combine your second mixture into the Guinness mixture (first bowl).
8. Pour your mixture (evenly) into your cupcake pan.
9. Bake 20-25 minutes  Be sure to let cupcakes cool completely before removing from pan to frost.

frosting DIRECTIONS:
1. Put your cream cheese and salt into a bowl (preferably an electric mixer) and beat until light and fluffy.  I usually use the medium speed on mine and it only takes a couple minutes.
2. Still on medium speed, gradually beat in the heavy cream until smooth.
3. Still on medium speed, gradually mix in powdered sugar until the entire mixture is smooth.
4. Frost your cupcakes once they are completely cooled and then spinkle cocoa powder & sprinkles on top if desired!
5. EAT UNTIL YOUR HEART IS CONTENT! 


Thanks for reading if you've made it this far and I hope you stop by my little corner and introduce yourself! (And if I ever come up with a diet version of his recipe I'll be sure to post it.  I just haven't had enough motivation yet!)


Tuesday, January 15, 2013

Guest Post: You Need a Budget

It's been another day here in Charlotte. I would like to say that our place is coming together, but now that the movers have show up with all of our stuff, it is even more of a disaster. Hopefully, by the end of this week we will have things in order.

I have asked another one of my lovely blog friends to guest post today. Rebekah was one of my very first followers and even recently won the 100 follower give away! Since one of my goals for next month is to re-do my budget, I have asked her to share with ya'll her budgeting technique! I hope you guys learn a lot from her, as I did! And if this just isn't enough for you, check out her blog, Living && Learning for more great stuff!

Without further ado...


 Hi! My name is Rebekah, I blog over at Living && Learning.  I'm so excited to be here today! I was over the moon when Lindsey asked me to do a guest post! I just love her blog & it's one of my daily reads!

Just a tid bit about me; I'm your average Texas girl {born & raised} and married to a great guy who puts up with way too much out of me!

Through a long series of events, some beyond our control & others, just plain bad decisions, The Hubs and I found ourselves in quite the pile of debt when we got married 2 years ago.
When I started blogging - it was a way to document our work towards financial freedom.
It's defiantly evolved from that, but living within our means is still an important part of our life and something I occasionally blog about.


Today I want to tell you about a great budgeting tool, YNAB!
YNAB is short for You-Need-A-Budget
It's not fun, but no matter who you are - you need a budget to be financially healthy!

Next month, the Hubs & I will be paying off the last of our credit card debt!!
 Using the YNAB system, we've identified frivolous spending and cut back - we will have paid off about $7500 in debt in just over a year!

There's no time to wait! When I talk to people about setting up a budget, I hear something like "we'll look at doing that when we have a normal month" or "we have this big expense this month, so maybe next month?"

"There are no normal months. Your expenses do not occur evenly throughout the year, and if you don’t plan for the high-expense months, you’ll be in a world of hurt."

YNAB is really easy to use! It keeps all your information in one place and helps you to monitor your expenses and find ways to reduce unnecessary spending.

This isn't for the faint of heart. You can't be half-hearted about wanting to fix your finances or a spending problem and use YNAB effectively. It takes dedication and work.

YNAB works with 4 basic principles -

1. Give every dollar a job
2. Save for a Rainy Day
3. Roll with the Punches
4. Live on Last Month's Income

The first step in budgeting is tracking and knowing your expenses. YNAB is excellent for this!
The reason YNAB works so well for us is it creates a deep accountability.  When used properly, you don't look at your bank account to see your 'available funds', you look to your budget to see how much money you have left for the month. Your budget that accounts for your known upcoming expenses. This deep accountability revolves around manually entering all of your transactions.


One of my favorite features of YNAB that I haven't found with another form of budgeting is the ability to see the average of past months amounts spent to help you make an educated decision on how much you should budget this month.


The details:  You can get YNAB free for 34 days if you're interested in checking it out but aren't sure that you're reading to take the plunge.  The cost of the plunge you ask? $60.00
This is a one time purchase, and for us - it was worth it!
If you follow this link, you can get a discount on the purchase of YNAB software as a referral bonus.

Disclaimer: I was in no way compensated by You Need A Budget Inc. or encouraged to review their product. The views and opinions were entirely my own based on my experiences with their company and software. Also, for the record: I have changed some of the figures numbers and amounts you are seeing (a girls' gotta have some secrets ;)  )

Thank you so much for letting me bend your ear! I hope you'll consider YNAB, or some of the other great options out there for managing your money responsibly!

Monday, January 14, 2013

Guest Post: Banana, Peanut Butter, Chocolate Bites

This week B and I are moving into our new apartment and getting acquainted with our new town, Charlotte. The moves should be showing up today with all of our stuff, but since it will take me a while to get everything in order, I wanted to invite a couple guests to share some of there wisdom this week. 


Today,  Pamela from Pamela's Heavenly Treats is sharing her recipe for banana, peanut butter, and chocolate bites (YUMM!!). I met Pamela through a cookie swap I did during the holidays. I love her blog because she loves to bake, like me, and also likes to make things a little bit healthier, too! You MUST check out her wonderful blog!


Hello there! I want to first thank Lindsey for having me share a post today on her wonderful blog!  I am Pamela the lovely behind Pamela's Heavenly Treats. I love sharing healthy and yummy desserts, mainly cupcakes and cookies!  I would love to have you stop by and say hello!

Now who would have thought that banana, peanut butter and chocolate would go together, and let alone make a yummy and healthy treat! Well it does, it got a thumbs up in my house, even my little one loved them!  

So today we have Banana, Peanut Butter and Chocolate Bites which is the easiest treat I think I ever made.  


Ingredients

3 bananas (sliced)
1 cup peanut butter
2 cups melted chocolate

Directions

Slice bananas and place on a baking tray. Spoon about 1/2 tablespoon of peanut butter on top of each banana slice. Place another banana slice over the peanut butter so it looks like a sandwich. Freeze until firm, about 2 hours.


Melt chocolate chips. Place banana pieces in the melted chocolate, one by one, until covered in chocolate all around.  Place the bananas back on the tray and let them set.  Keep banana bites in the freezer or fridge.  


I would love to connect with you!
You can find me at Twitter Blog Pinterest Etsy Shop


Thursday, January 10, 2013

White Mocha Scones

After the success of the Cranberry White Chocolate scones, I wanted to try another recipe out. This time I made them slightly more healthy. Just slightly. But they can easily be made a little more rich by using whole milk and all purpose flour instead of whole wheat flour.
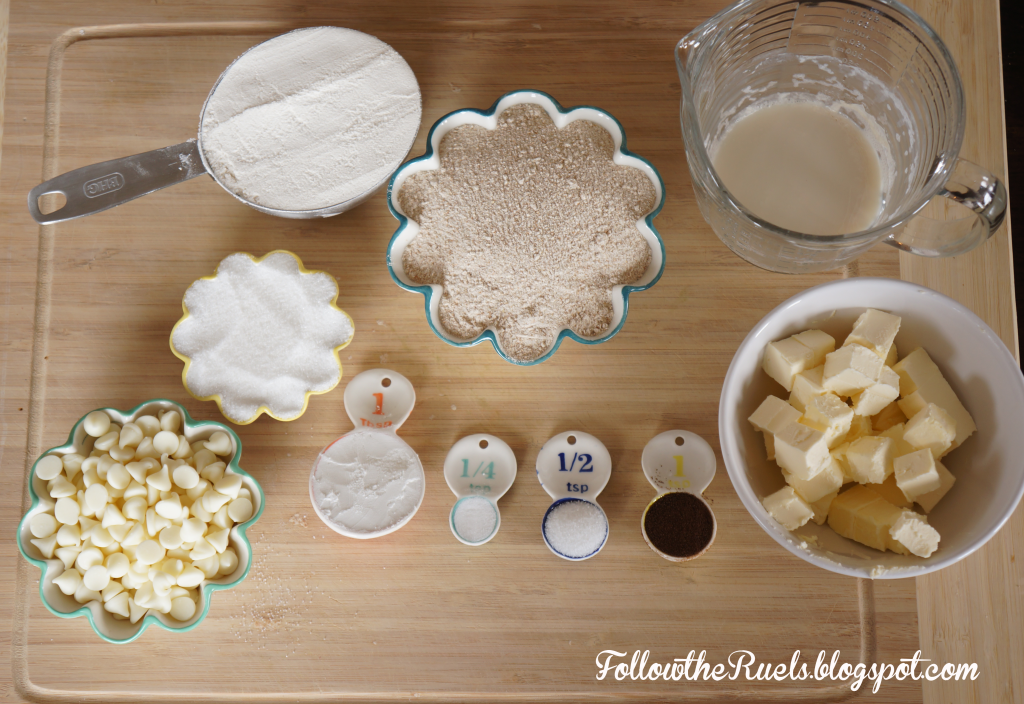
What I used: all purpose flour, whole wheat flour, sugar, baking powder, baking soda, salt, butter, instant espresso, almond milk, egg, vanilla, white chocolate chips.

I originally only used 1 tsp of the espresso powder, and I don't think it was enough. When I make these again, I will definitely be adding more. If you don't have espresso powder you can probably use 1/2 cup of strong coffee and only 1/4 cup milk.

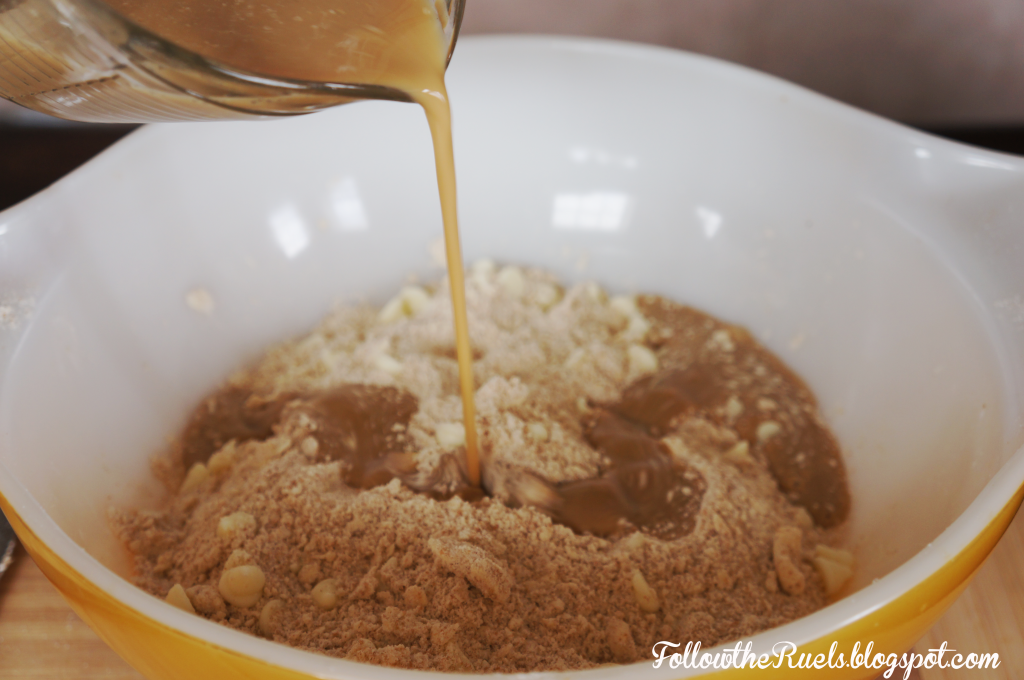
First, I took 1/4 cup of the almond milk, heated it up in the microwave and then dissolved the espresso in the hot milk. I let it cool for a few minutes while I prepared the dry ingredients and butter, then added the rest of the milk to cool it down (don't want to melt the butter). Then I proceeded as follows, cut butter into dry ingredients, mixed in chocolate chips, then poured wet ingredients into dry and stirred to combing.

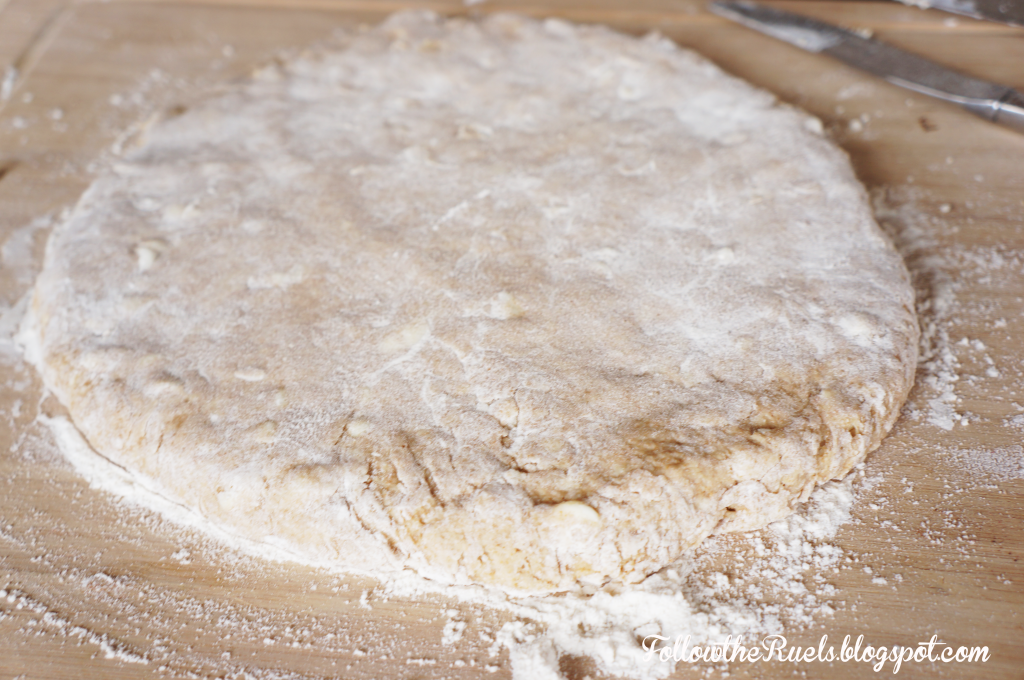
On a floured cutting board I pressed out the dough into a 2 inch thick disc, and used a cup to make circles of dough.

Just like the other scones, I placed them about 1-2 inches apart on prepared baking sheet and baked for about 15 minutes.

One thing I did differently was add a chocolate drizzle on top to add more of that white mocha flavor. I melted extra white chocolate chips in the microwave, then drizzled over the scones using a spoon. I added espresso powder to the remaining chocolate, then drizzled again. Because it was so cold in our apartment, the chocolate hardened pretty quickly, which was good because I was eager to dig in!

These were just as big a hit with my coworkers as the cranberry scones were with my family!

See recipe below.

White Mocha Scones

Ingredients
1 cups all purpose flour
1 cup whole wheat flour
1/4 cup sugar
1 tbsp baking powder
1/4 tsp baking soda
pinch of salt

4 tbsp (one stick) cold butter, cut into small pieces
1-2 tsp (to taste) of instant espresso
3/4 cups of almond milk, divided
1 egg, lightly beaten
2 tsp vanilla extract
3/4 cup white chocolate chips


Directions
1. In a small bowl or measuring cup, heat up 1/4 cup of the almond milk in the microwave for 45 seconds to a minute. Mix in the instant espresso until dissolved. Pour in the rest of the almond milk to cool the mixture down.
2. Meanwhile, in a large bowl, mix the flour, sugar, salt, baking powder, and baking soda together.
2. Add in the butter pieces and cut into the flour mixture using a pastry cutter or two knives.
4. When the butter and flour mixture resembles crumbs, mix in the chocolate chips.
3. To the milk mixture, add egg and vanilla. And mix together. Pour into the butter and flour mixture. Stir together using a large spoon until the dough is tacky and combined.

5. Turn the dough out on to a floured surface and flatten to 1 1/2 to 2 inch thick. Using a biscuit or cookie cutter, cut out rounds of dough and place on prepared baking sheet.
6. Bake at 350 for 15 to 20 minutes, or until golden brown on top.

Optional chocolate drizzle
Ingredients 
1/4 cup white chocolate chips
1/2 tsp coconut oil or vegetable oil
1/2 tsp instant espresso

Directions
In a small cup or bowl, melt chocolate in the microwave for about 1 minute. Stir in the oil. Using a spoon, drizzle about half of the chocolate mixture over the top of the scones. After all scones are covered, stir in espresso into the melted chocolate. Drizzle the espresso chocolate over the scones in the opposite direction. Let chocolate cool and harden.

Wednesday, January 9, 2013

Farewell, Texas!

Today is my last day in Texas, as a resident. At least for a while.

I moved here 9 1/2 years ago thinking I wouldn't stay more than 4 - the time it would take me to get my college degree. Little did I know that Texas would make a convert out of me before those 4 years were up. 

After college, in Waco, I moved to Houston where jobs and friends were plentiful.  3 years later, I moved to Dallas for grad school... and to be closer to some boy. In between,  there have been many road trips, day trips, spring breaks, and celebrations across this great state. I feel as if I have seen more of it than my own home state of California. 

It was also in Texas where I would meet the boy who will soon become my husband, and who is taking me away from this place I've called home for almost a decade. 

Texas,  I will miss your barbeque,  rodeos, no income tax, highly inflated ego, traditions,  and especially your people,  who are some of the friendliest I've ever met.

Farewell, Texas! I'm sure we'll meet again someday.